Learn to Draw Using Procreate: A Step-by-Step Guide on Brushes, Layers, and Advanced Features
Aug 6, 2023
In the digital age, artists have a plethora of tools at their disposal to bring their creative visions to life. One such tool is Procreate. If you're an aspiring digital artist looking to learn how to draw using Procreate, you're in the right place.
This article will guide you through the process of learning how to use Procreate effectively and provide you with some valuable tips and tricks to enhance your digital drawing and painting skills.
What is Procreate?
Procreate is a powerful digital painting and illustration app designed exclusively for iPad and iPad Pro. It offers a user-friendly interface, a wide array of brushes, and numerous tools and features, making it a top choice for artists and designers worldwide.
Getting Started: Learning How to Use Procreate
Understanding the Interface
When you first open the app, you may feel overwhelmed by the various tools, menus, and options. Let's explore the Procreate interface and the essential elements that form the backbone of this digital art software.
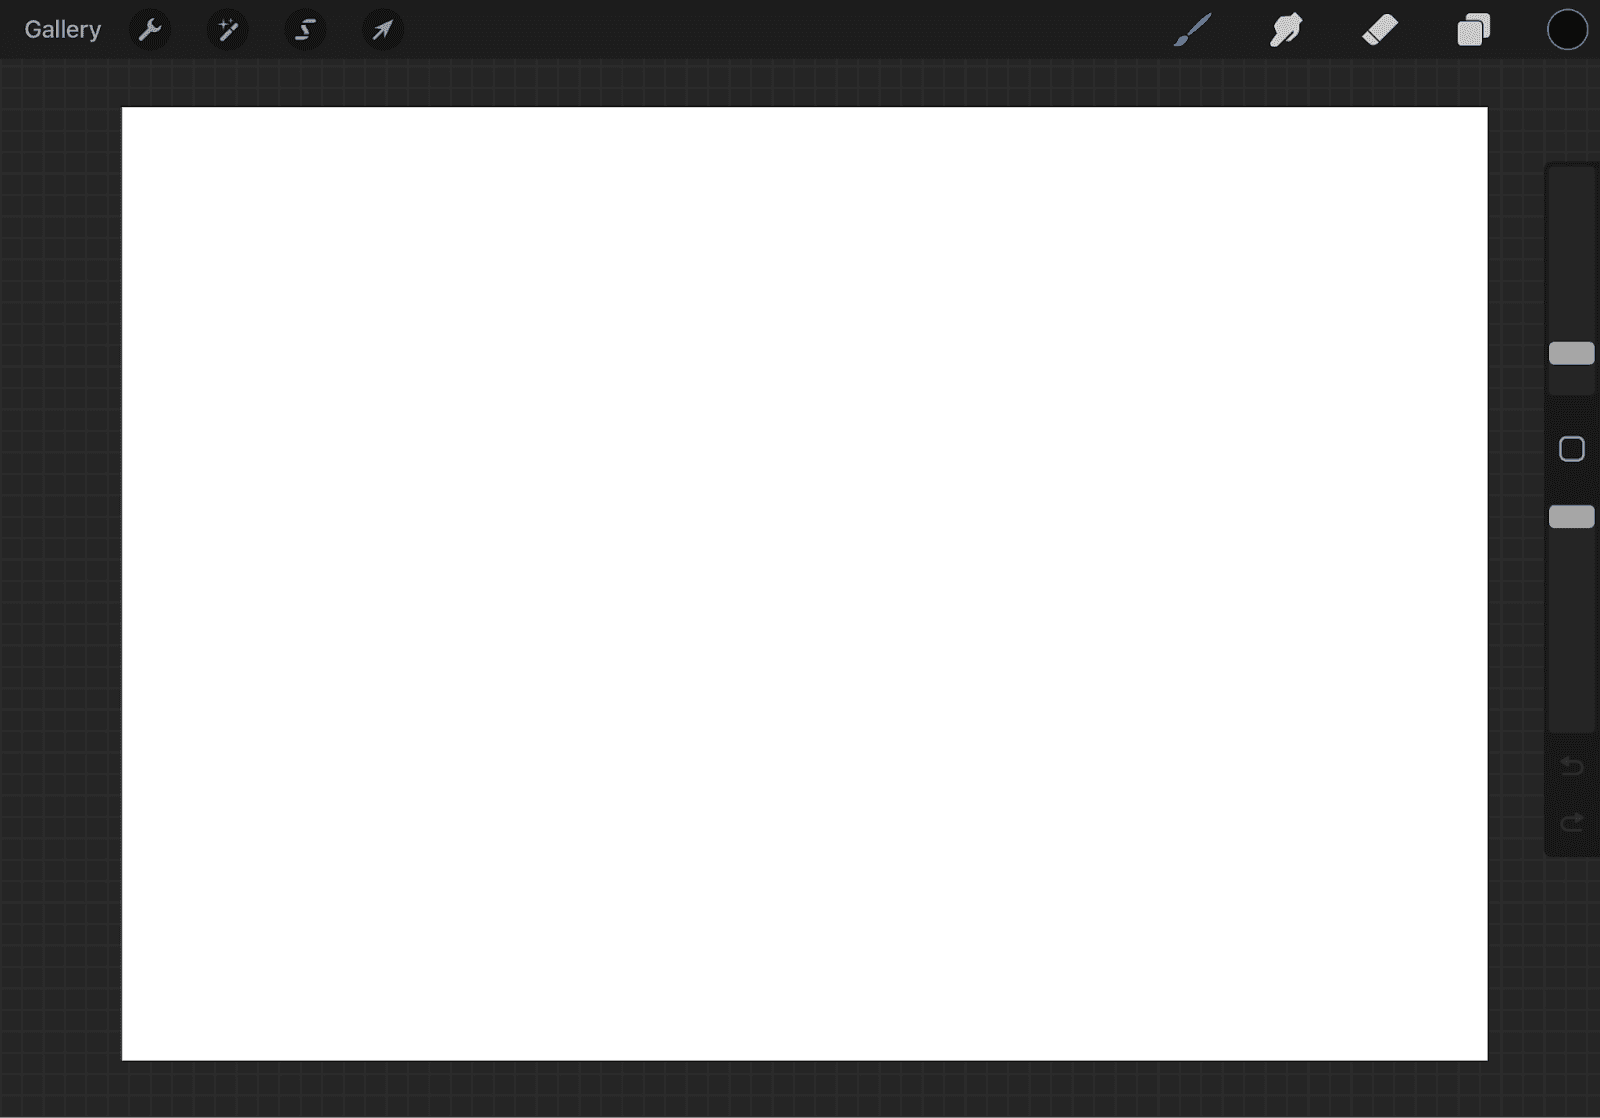
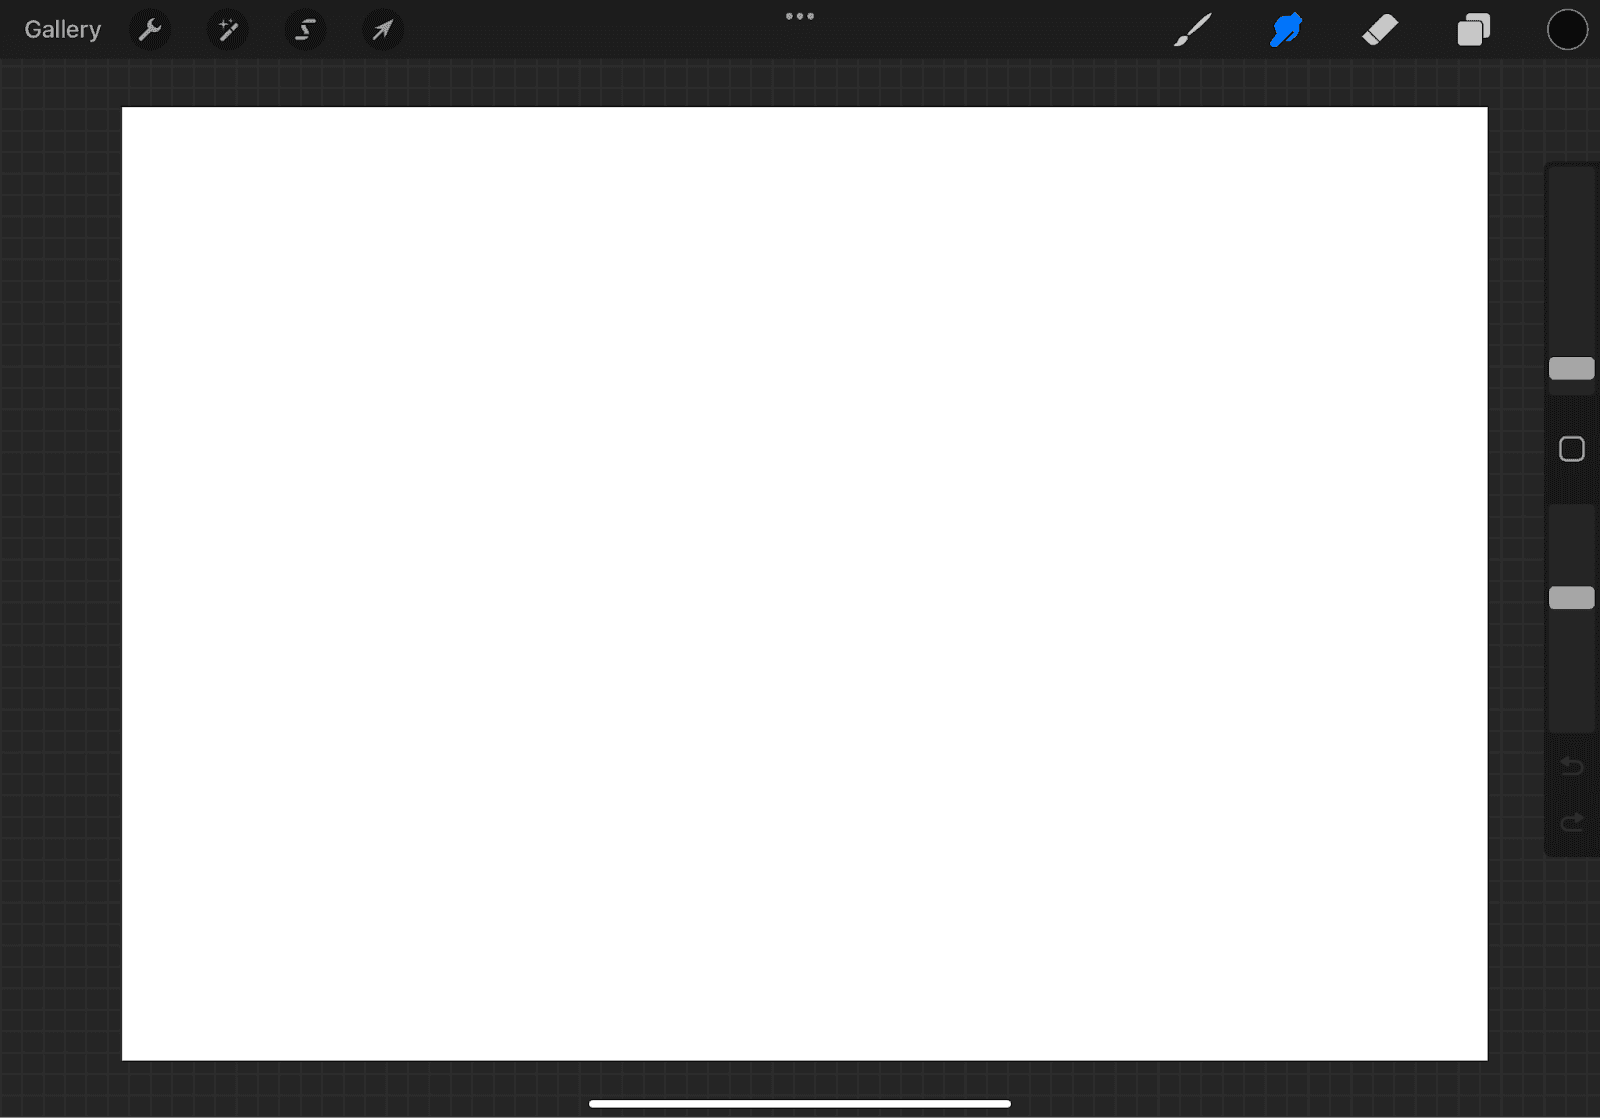
Canvas and Toolbar
Upon launching Procreate, you'll find yourself facing a blank canvas. The toolbar, located at the top of the screen, provides quick access to essential functions. You'll find buttons to create a new canvas, import images, undo/redo options, and export your artwork here.
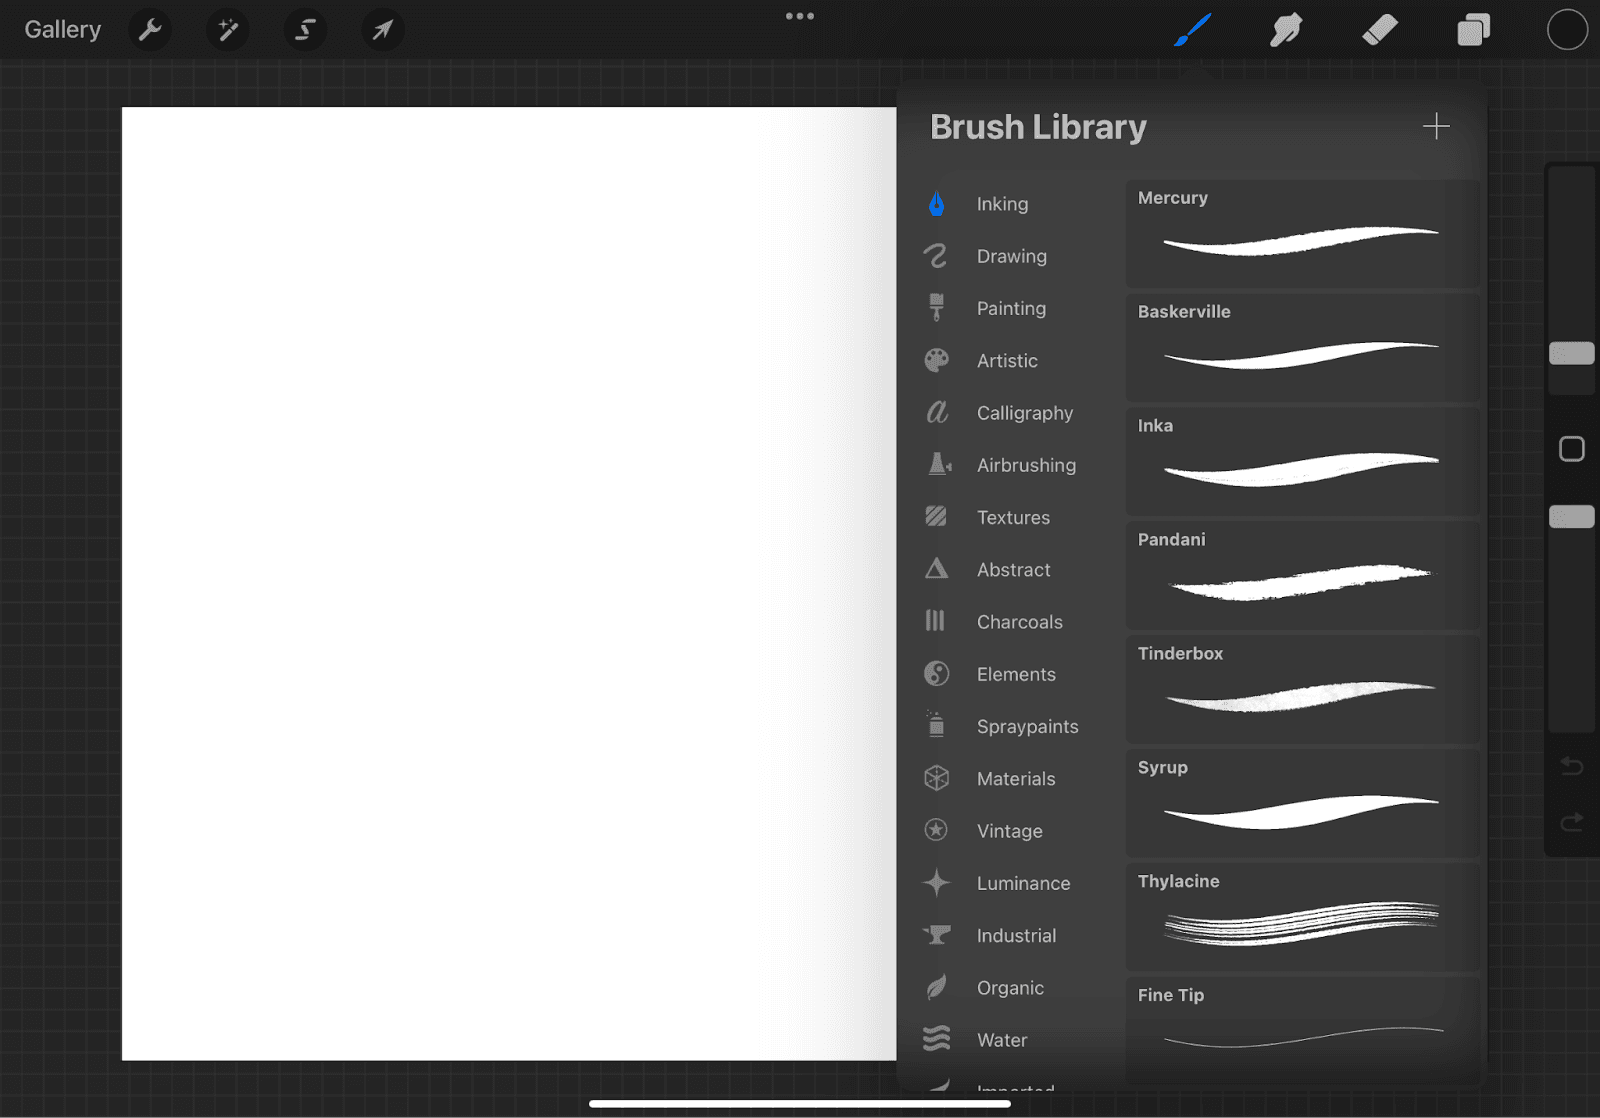
Brush Library
The heart and soul of Procreate lie in its brushes. The paintbrush icon in the toolbar grants you access to an extensive Brush Library, ranging from pencils and inks to watercolors and textures. It allows you to organize, import, and customize brushes to suit your artistic style. To start drawing, select a brush and create strokes on the canvas. Adjust the brush's size, opacity, and other parameters to achieve the desired effect.
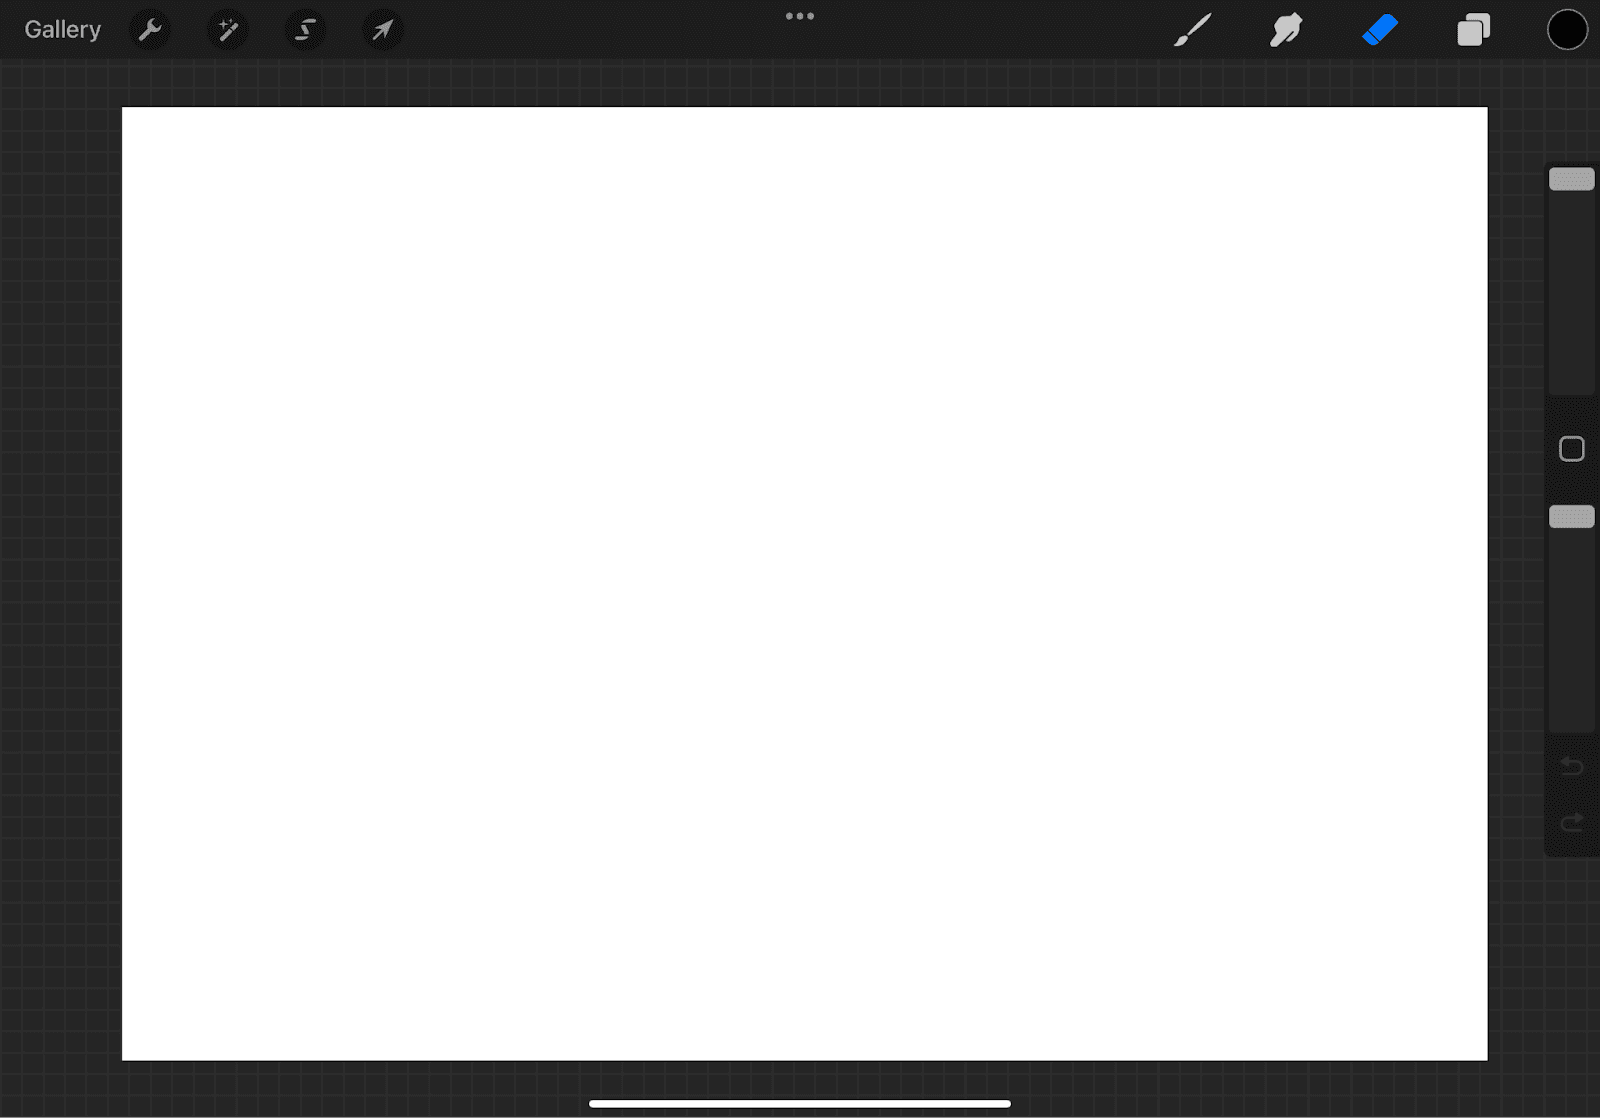
Erasers
Like brushes, the eraser tool in Procreate comes with customizable settings, enabling you to erase parts of your artwork precisely.
Smudge and Blur Tools
Procreate offers smudge and blur tools that blend and soften colors. These tools are handy for creating realistic textures and achieving various visual effects.
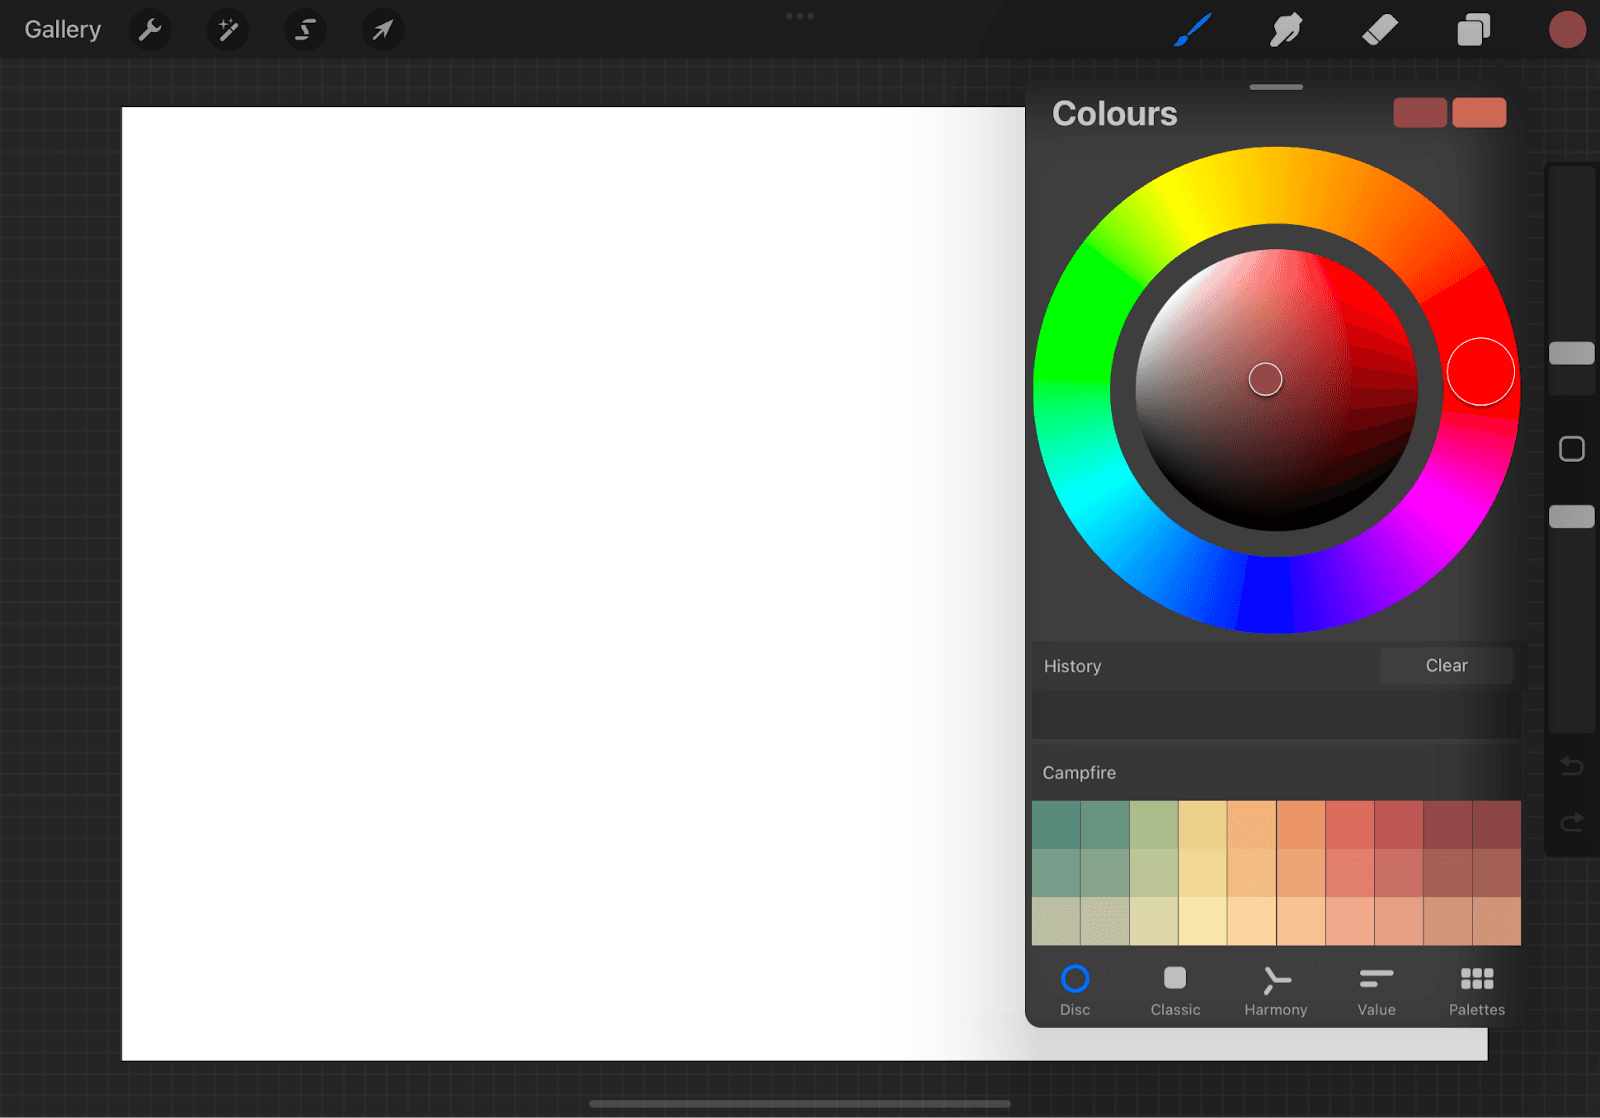
Color Picker and Palettes
Located in the top-right corner, the color picker is your gateway to an endless spectrum of colors. Tap the color circle to choose your desired hue, and adjust the slider for saturation and brightness. Procreate also allows you to create custom color palettes, saving your favorite colors for quick access.
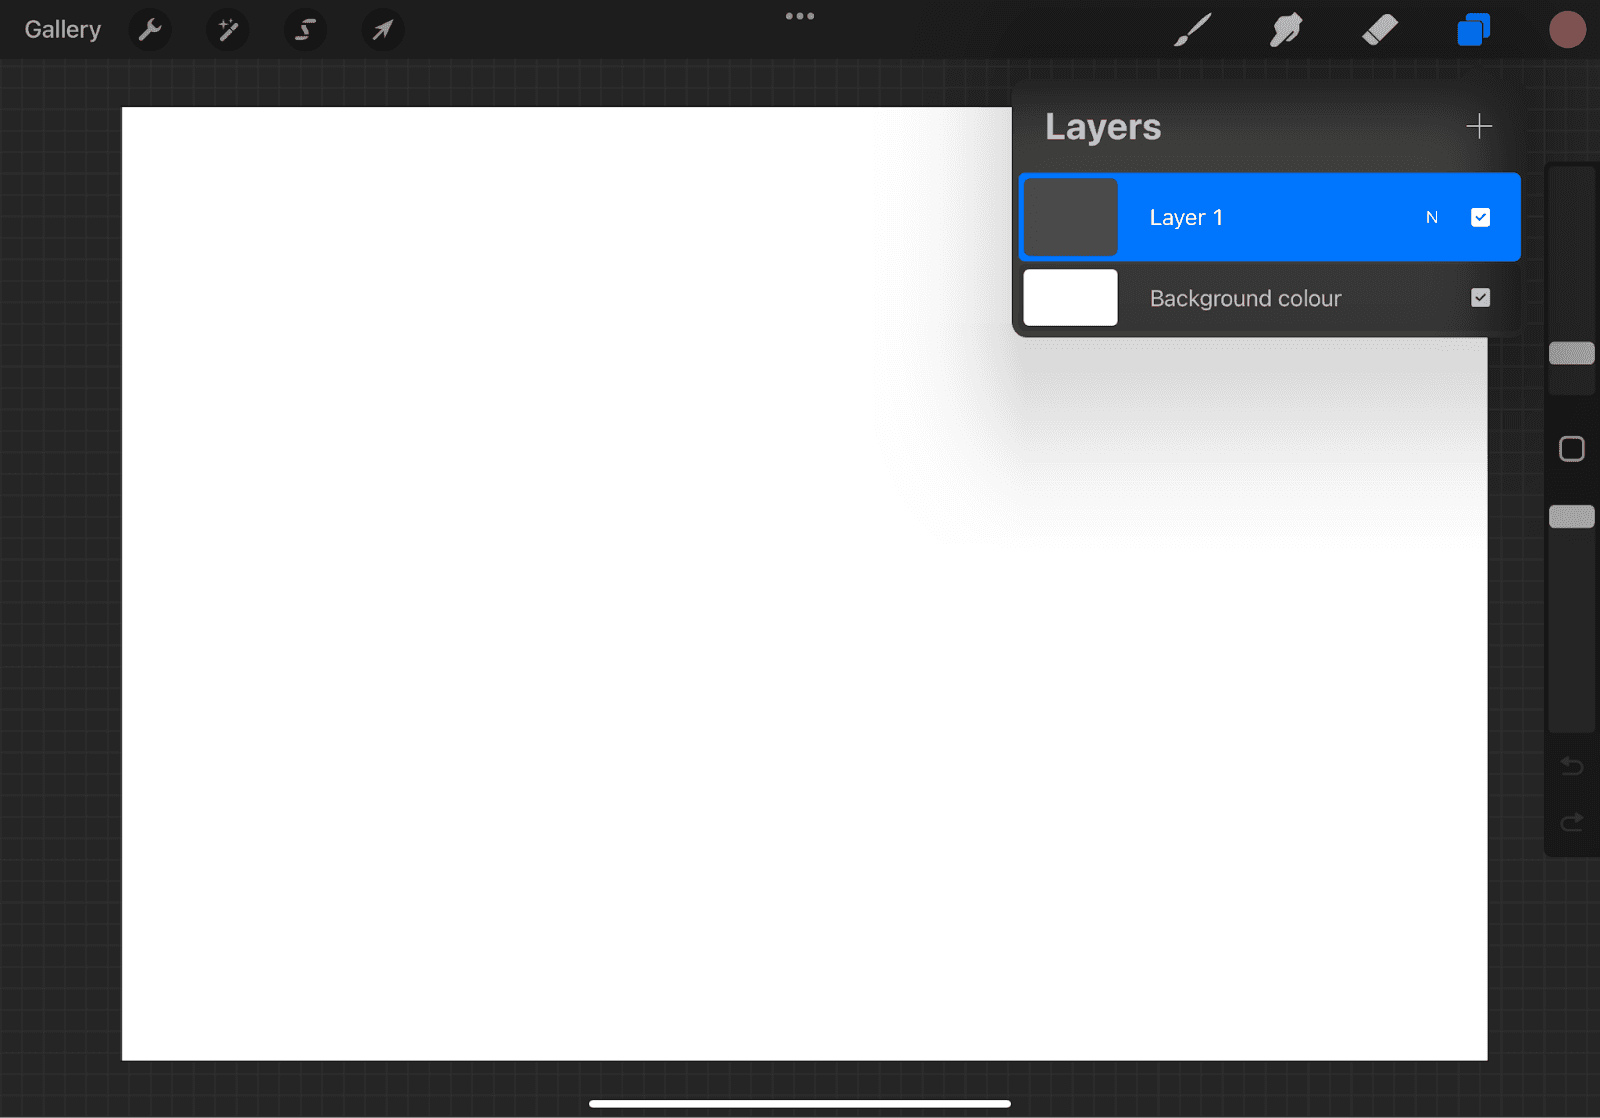
Layers
The Layers panel, accessible on the right-hand side, allows you to stack elements of your artwork separately, just like transparent sheets. The feature lets you change specific parts of your composition without affecting the rest.
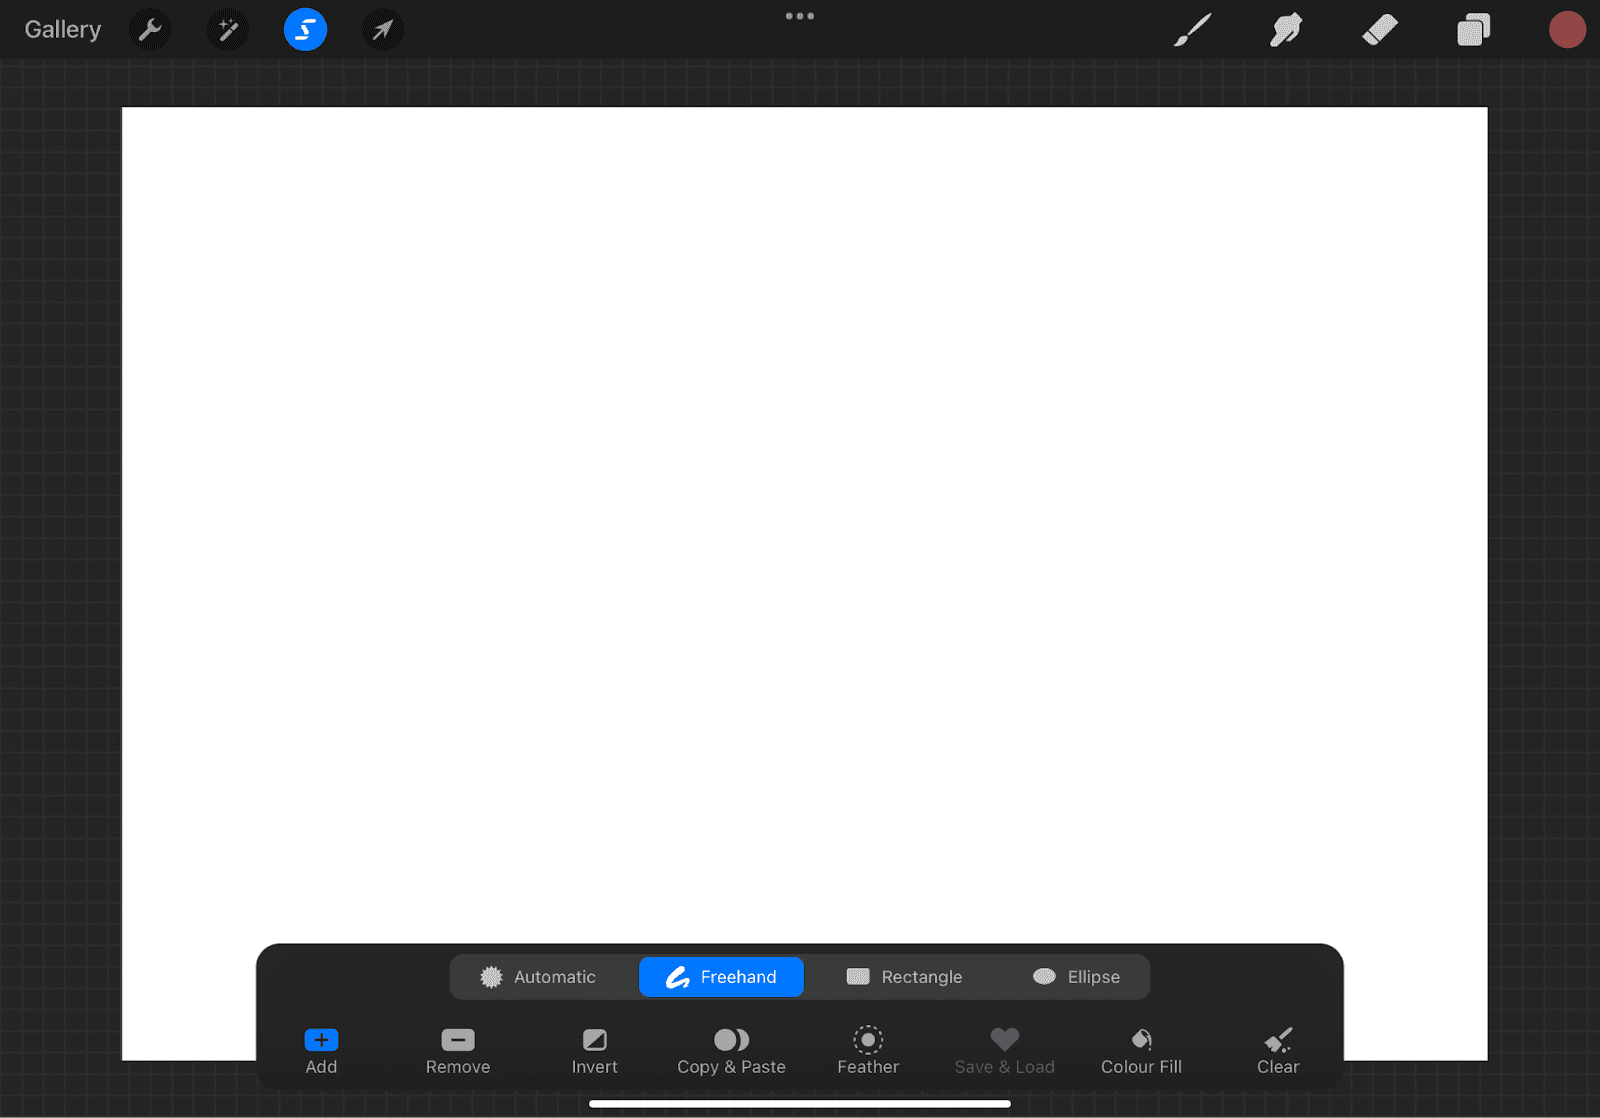
Transform and Selections
The Transform tool lets you resize, rotate, and distort elements on your canvas, while Selection tools allow you to isolate specific areas for editing or manipulation. These tools are essential for precise adjustments and composition refinement.
Navigating the Canvas: Size, Resolution, Rotation, and Zoom
The Procreate canvas is your digital art playground.
Creating and Managing Canvas Sizes and Resolutions
To create a new canvas, open Procreate and tap the "+" symbol on the top right corner of the gallery screen. You'll be presented with various preset canvas sizes, such as square, portrait, landscape, and custom sizes.
If you want a specific canvas size, tap "Custom Size" and enter the dimensions in pixels or other measurement units. Consider the resolution of your canvas, as it impacts your artwork's level of detail and quality. Higher resolutions are ideal for projects that may require printing or high-definition display.
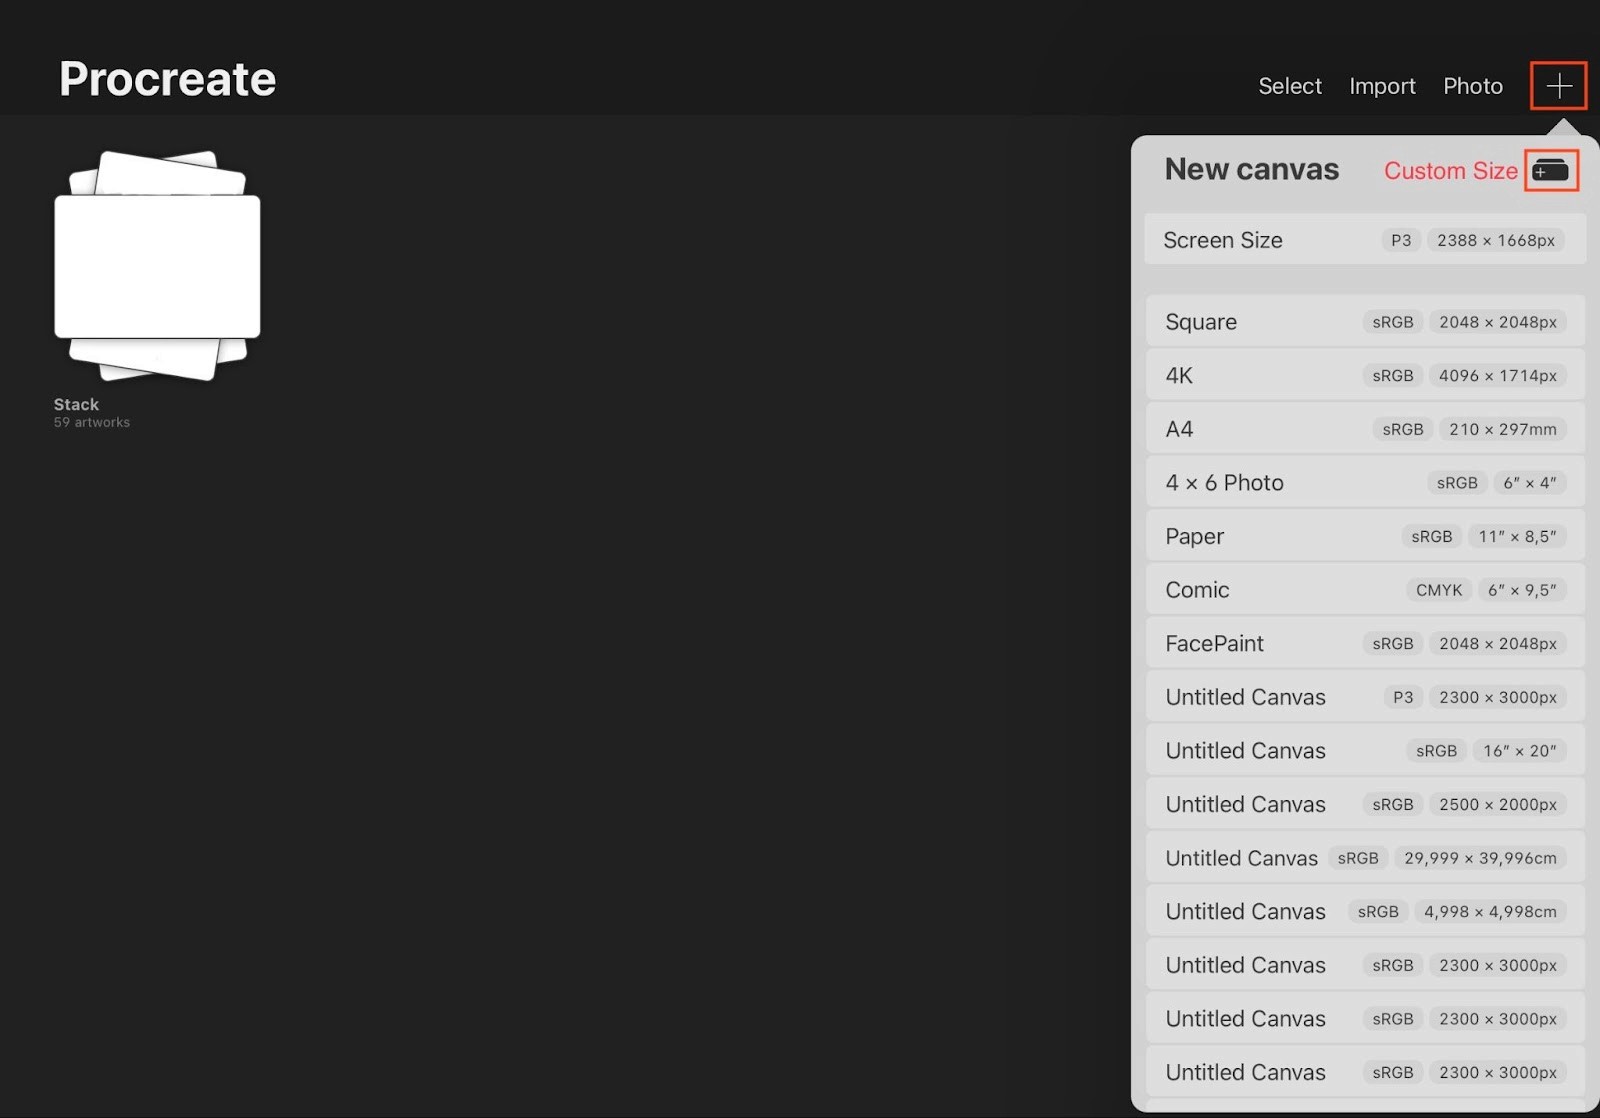
Depending on your intended output, Procreate's canvas settings also let you choose the color profile, such as RGB or CMYK. RGB is commonly used for web-based art; CMYK – for print projects.
Canvas Rotation and Zoom Options
Using the canvas rotation and zoom options can significantly improve your workflow. Rotating the canvas can give you a new perspective on your artwork while zooming enables you to focus on fine details with precision.
Rotation: The canvas rotation feature is handy for artists who prefer working at different angles. To rotate the canvas, use a two-finger twist gesture on the screen. This allows you to draw or paint more comfortably without physically adjusting your device.
Zoom: Zooming in and out of your canvas helps you focus on intricate details or get an overall view of your artwork. You can pinch with two fingers to zoom in and out. This gesture allows for precise work and enhances your control over the tiniest elements in your creation.
Panning: When zoomed in, you can pan across the canvas by using two fingers to move the view. This way, you can work on different areas without zooming in and out repeatedly.
Your First Steps as a Digital Artist: Learning How to Draw in Procreate
Starting with the Basics
As with any new software, starting with the basics is essential to grasp the fundamental tools. Begin by experimenting with simple strokes and shapes using the default brushes. Play around with the opacity and brush size to understand how they affect your drawings.
Importing Images and References
One of Procreate's most valuable features is the ability to import images and references directly into your canvas. Whether seeking inspiration, using reference images to guide your artwork, or honing your skills, importing references can greatly enhance your drawing experience.
Here's how you can import images and references in Procreate:
Step 1: Open Procreate and create a new canvas or open an existing one.
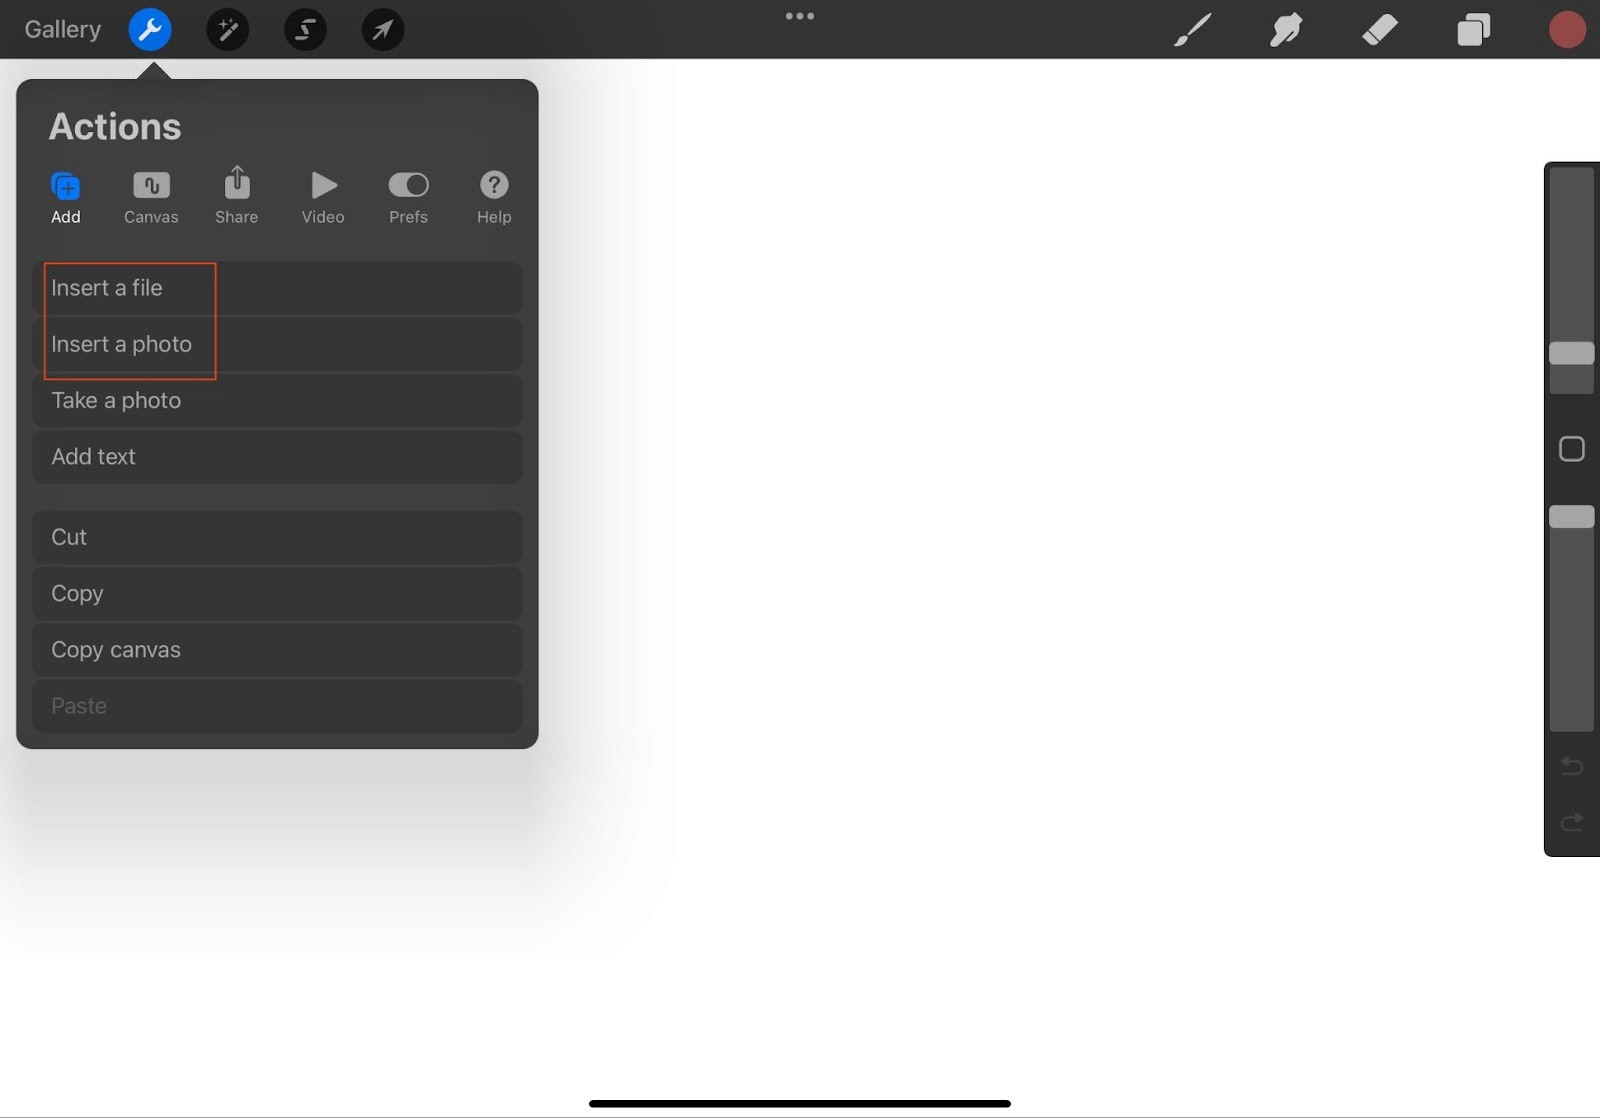
Step 2: Tap the "+" symbol on the top right corner of the screen to access the "Insert" menu.
Step 3: From the "Insert" menu, select the "Insert a Photo" or "Insert a File" option, depending on the source of your reference:
If the image is on your device, choose "Insert a Photo," and Procreate will allow you to browse your photo library to select the desired image;
If the image is in a cloud storage service or another app, select "Insert a File," and Procreate will prompt you to browse and import the file.
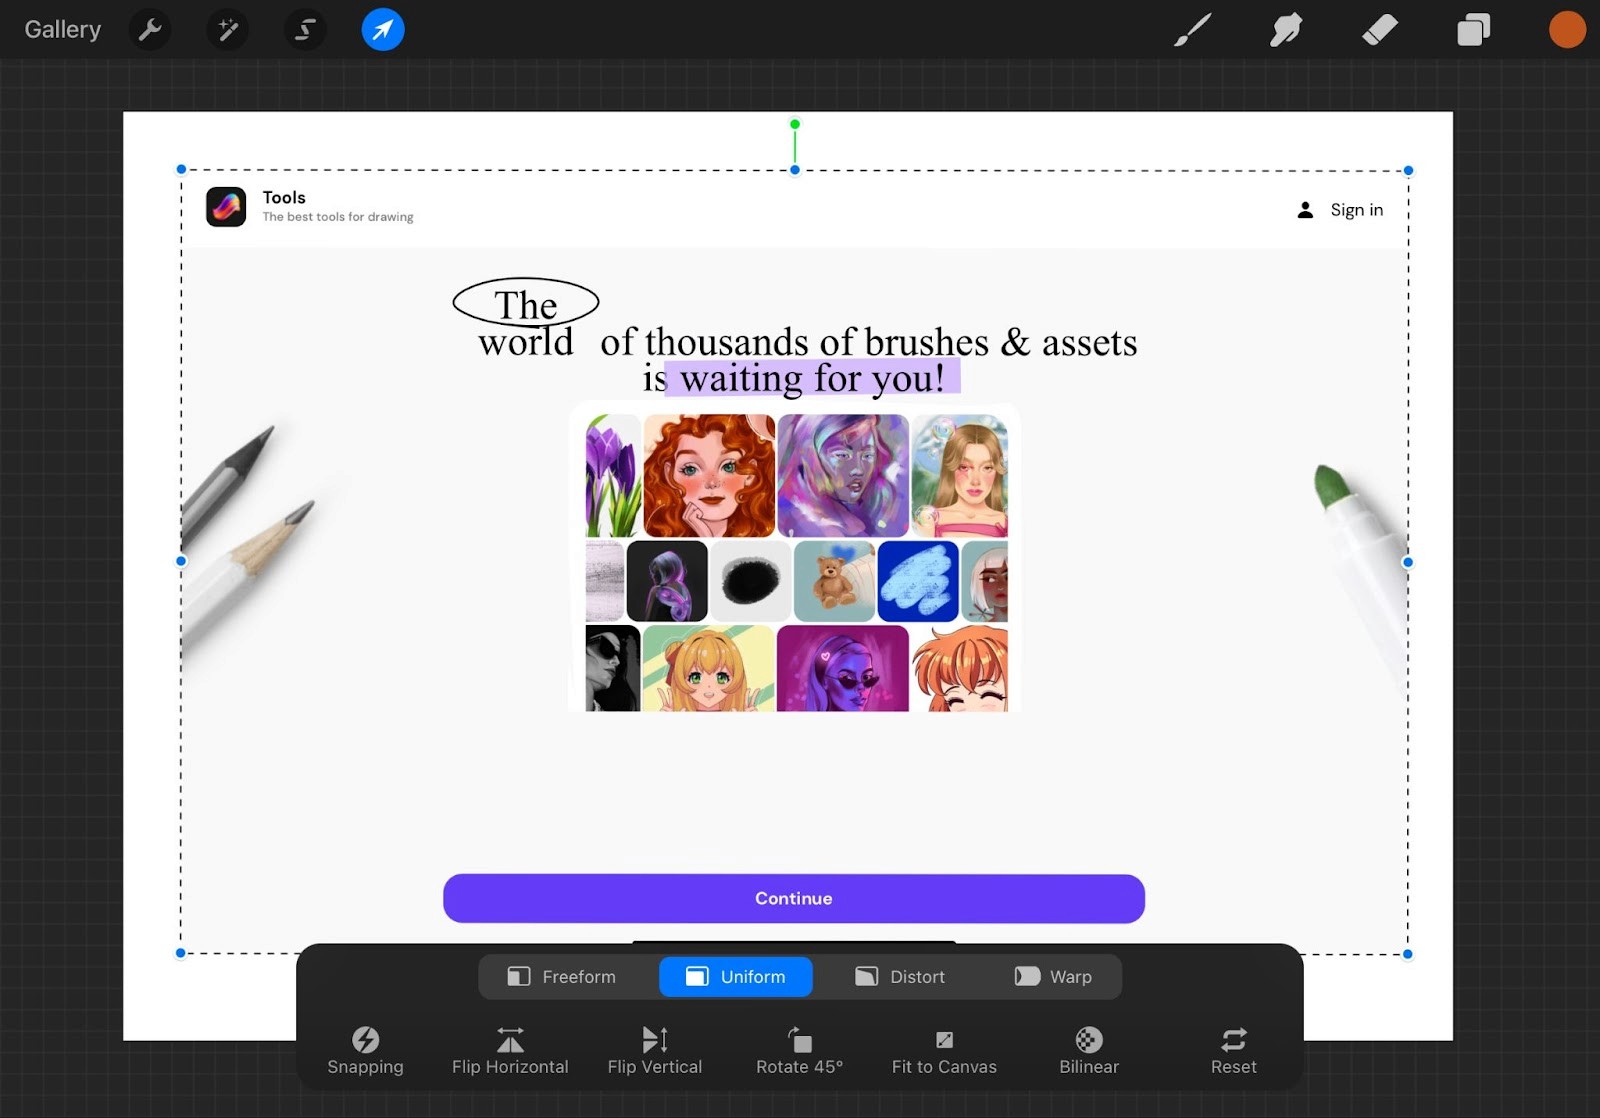
Step 4: Once the image is imported, you can resize, rotate, or position it on your canvas. Use two fingers to pinch and adjust the image size or rotate it with a twist gesture.
Working with references in Procreate is vital to an artist's growth. Firstly, they are a source of inspiration and ideas, sparking creativity and guiding unique interpretations in the artwork. By studying references, artists can learn from observation, gaining insights into real-world elements, lighting, textures, and proportions.
Additionally, referencing various art styles aids in developing an artist's own unique style. Tackling complex references also pushes artistic boundaries, increasing confidence and skill levels for more ambitious projects.
Tracing references can be a valuable learning tool for beginners, improving hand-eye coordination and developing muscle memory.
It is crucial to emphasize that using references is not about copying someone else's work but learning from the world around you to enhance your own artistic vision.
Mastering Procreate Brushes
Procreate's extensive collection of brushes is one of its greatest assets. From pencils to inks and watercolors, brushes can bring your artistic visions to life with remarkable precision.
Here're the basic brushes and their uses:
Pencils and inks: These brushes mimic traditional graphite pencils, charcoal, and various inking tools, allowing you to create expressive line art and sketches with a classic feel.
Paintbrushes: Procreate offers an array of paintbrushes that simulate watercolors, acrylics, oils, and more. These brushes enable you to create stunning digital paintings with rich textures and vibrant colors.
Airbrushes and sprays: Ideal for adding subtle gradients, highlights, or special effects, these brushes replicate the characteristics of airbrushing and spray painting techniques.
Textured brushes: Textured brushes introduce various surface textures, such as canvas, paper, and watercolor paper. These brushes add authenticity and depth to your artwork.
Special effects brushes: Procreate includes brushes that generate special effects like glows, particles, and lighting, perfect for creating captivating fantasy or sci-fi artwork.
Calligraphy brushes: If you're a fan of lettering and calligraphy, Procreate offers brushes that emulate various calligraphy styles, making it easy to add elegant lettering to your artwork.
Smudge brushes: Smudge brushes blend and soften colors, enabling seamless transitions and creating stunning painterly effects.
Utilizing Layers Effectively
In traditional art, correcting mistakes or changing an artwork can be challenging. In digital art, however, layers reimagine the creative process entirely. Each layer in Procreate is like a transparent sheet that contains individual elements of your artwork. You can draw, paint, or add effects on a specific layer without affecting others, providing flexibility and control.
3 Examples of Using Layers for Comfortable Drawing Experience
Backgrounds and foregrounds: For landscape or scenery artwork, use layers to separate foreground elements, such as trees or buildings, from the background elements, like the sky or distant mountains. This way, you can modify each component independently, enhancing the overall composition.
Character design: When creating character illustrations, use separate layers for the body, clothing, facial features, and accessories. You can easily adjust each element individually, facilitating character customization and fine-tuning.
Special effects: Apply special effects on separate layers, like glows or lighting. This allows you to control the intensity and placement of the effects without impacting the base artwork.
Best Ways to Learn How to Use Procreate: Online Tutorials, Community Engagement, and Practice
While learning how to use Procreate, a structured approach is the most effective way to progress.
Online Courses and Workshops
Enroll in online courses or attend workshops dedicated to Procreate. These courses are designed to take you through the app's features step by step, from the basics to advanced techniques. Look for courses that offer hands-on projects and assignments to reinforce your learning.
Community Engagement
One of the most rewarding aspects of being a digital artist using Procreate is the sense of belonging to a vibrant and supportive community of like-minded creatives. Engaging with artist communities and forums offers several benefits, including:
Receiving constructive criticism helps you grow artistically;
Positive feedback and motivation keep you encouraged and confident;
Interacting with artists of diverse styles exposes you to new techniques and inspires creativity;
Collaborative projects encourage experimentation and camaraderie;
Experienced artists share technical tips to optimize your workflow;
The community provides support during creative blocks, helping you overcome challenges.
Regular Practice and Patience
As you embark on your journey to learn and master Procreate, remember that practice and patience are the cornerstones of artistic growth. Set aside dedicated time each day or week to practice drawing and painting. This regularity will help you build muscle memory and improve digital art skills.
Remember, every artist's journey is unique, and there's no definitive timeline for mastery. Be kind to yourself, celebrate your growth, and stay committed to practice and patience. As you persistently work with Procreate, you'll see your skills evolve, confidence increase, and creativity flourish.
Bonus Section: Procreate Drawing Tips and Tricks
Customizing Your Brushes
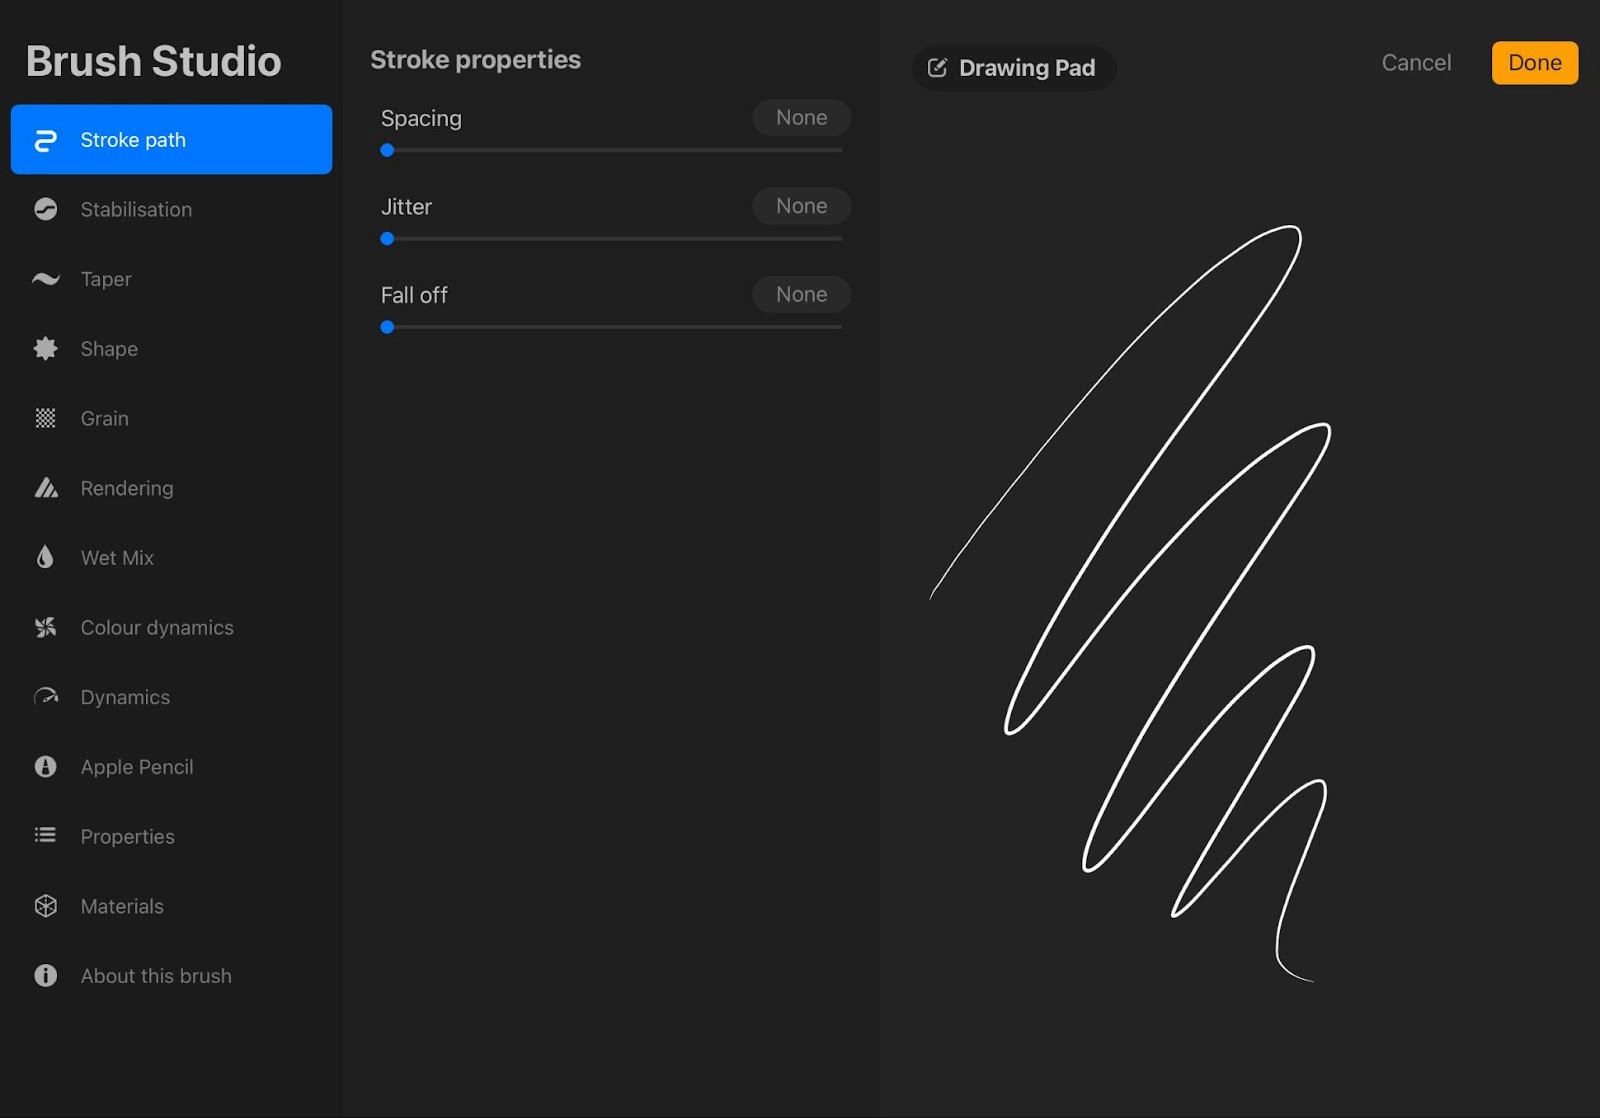
Customizing brushes in Procreate to suit different drawing styles opens up a world of creative possibilities. You can start by adjusting brush settings, such as size, opacity, flow, and spacing, to fine-tune your brush's behavior and create unique effects. Color dynamics can be utilized to add variation to your brushstrokes, automatically shifting between colors as you paint, resulting in dynamic and visually engaging artwork.
To give your digital artwork an authentic and organic feel, customize the texture and grain of your brushes to match the surface of your choice. Moreover, controlling the smoothing and streamlining settings helps you achieve smooth lines and precise details in your artwork. Once you've crafted a custom brush that complements your drawing style, save it to your brush library for easy access in future projects.
Learning Gestures and Shortcuts
One of the essential tips and tricks for Procreate is to learn how to optimize your digital art workflow with the app's gestures and keyboard shortcuts.
Commonly-used time-saving gestures in Procreate are:
QuickMenu: The QuickMenu is an invaluable feature that can be accessed by performing a gesture such as tapping and holding the screen with one finger or using a specific shortcut. The exact activation method might be customizable based on the artist's preferences. QuickMenu provides instant access to frequently used actions, such as brush adjustments, layer settings, and color options.
Two-Finger Tap: Double-tapping with two fingers on the canvas quickly undoes your last action. It's an efficient way to undo changes without disrupting your workflow.
Three-Finger Tap: A triple tap with three fingers on the canvas quickly redoes your last action, allowing you to toggle between different states effortlessly.
Zoom and Rotate: Pinch and spread two fingers to zoom in and out of your artwork. Rotate two fingers in a circular motion to rotate the canvas for more comfortable drawing angles.
Brush Size and Opacity: While painting, use a two-finger swipe up or down on the canvas to adjust the brush size and left or right to adjust the opacity. This gesture lets you modify brush settings without interrupting your flow.
Eyedropper: To use the Eyedropper tool, tap and hold the canvas with one finger using the same hand that you're holding your stylus (if you're using one). Make sure your finger is not touching the canvas while doing this to avoid accidental drawing. While holding down with one finger, move your stylus or another finger to move the Eyedropper tool to the area on the canvas where you want to sample the color. Release your finger to sample the color from that specific spot.
You can connect any compatible Bluetooth keyboard to your iPad or use the iPad Pro Smart Connector to attach a keyboard directly. Commonly-used keyboard shortcuts in Procreate are:
Undo and Redo: On an iPad with a physical keyboard, you can use "Command + Z" to undo and "Command + Shift + Z" to redo actions, just like on a desktop computer.
Brush Size and Opacity: Press the "Shift" key on your keyboard while using a brush and drag it up or down to adjust the brush size. Press "Shift" and drag left or right to modify the opacity.
Layer Shortcuts: With the layer selected, press "Command + J" to duplicate it quickly.
Group Layers: To group selected layers, use "Command + G." This helps organize and manage complex artworks efficiently.
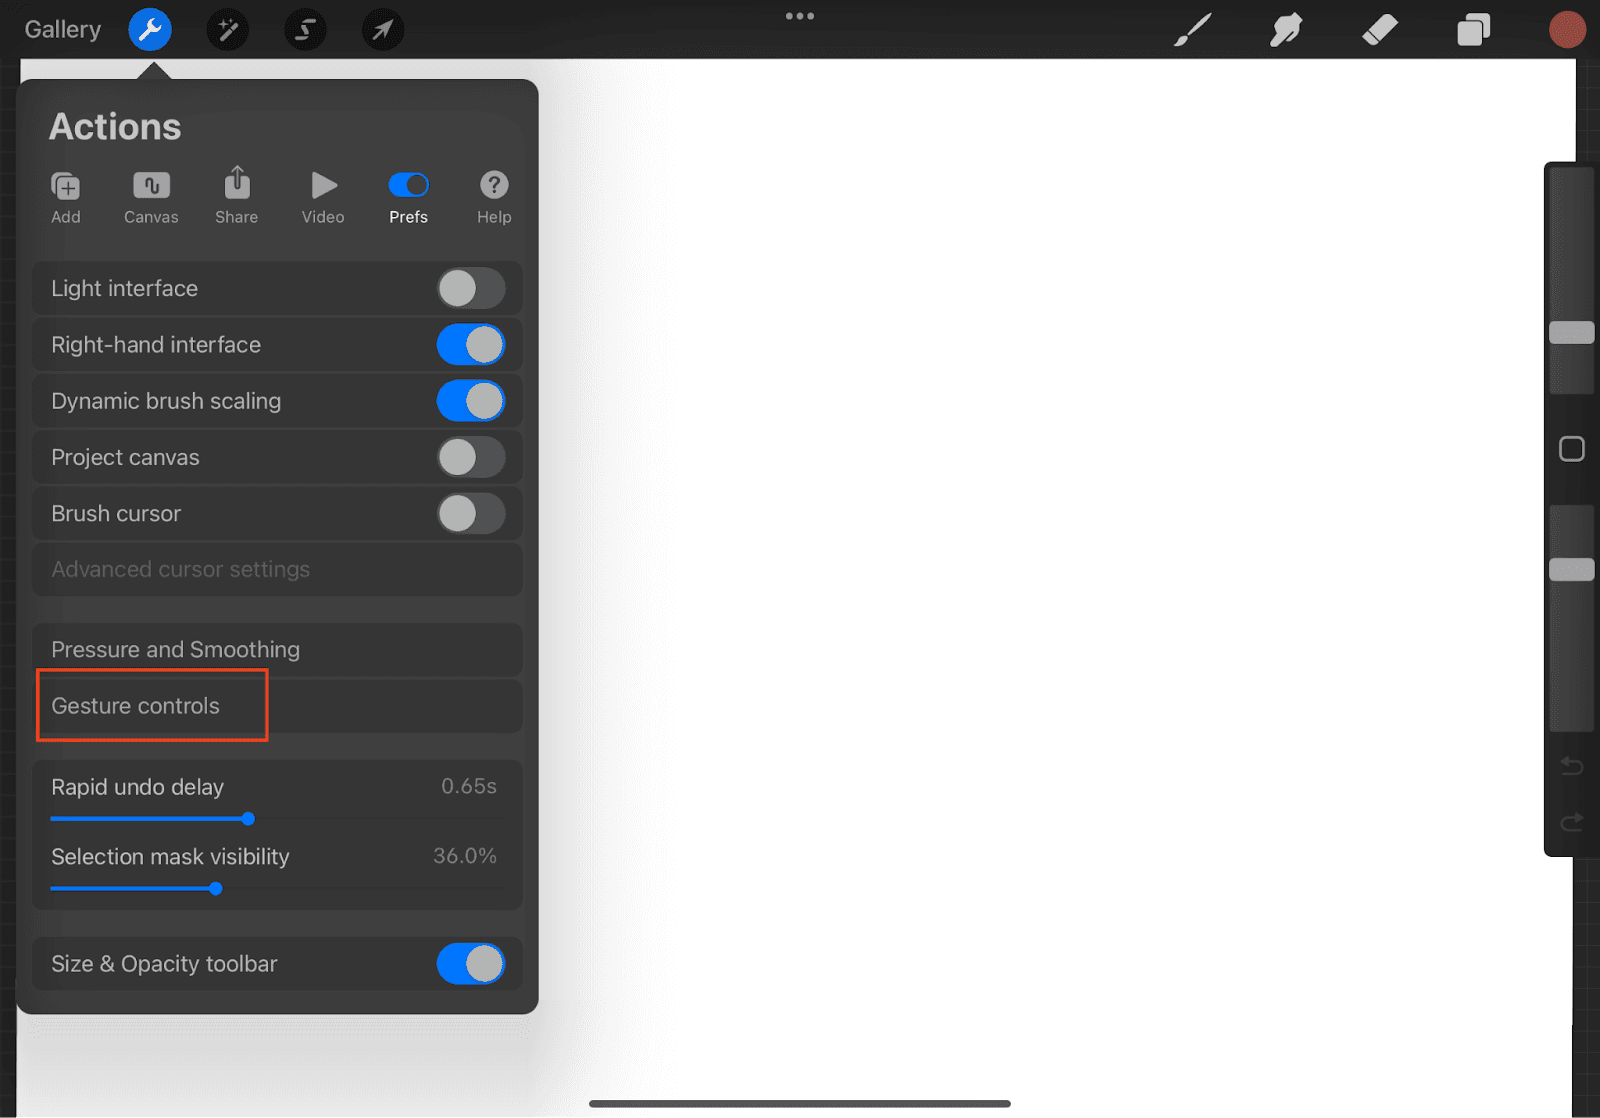
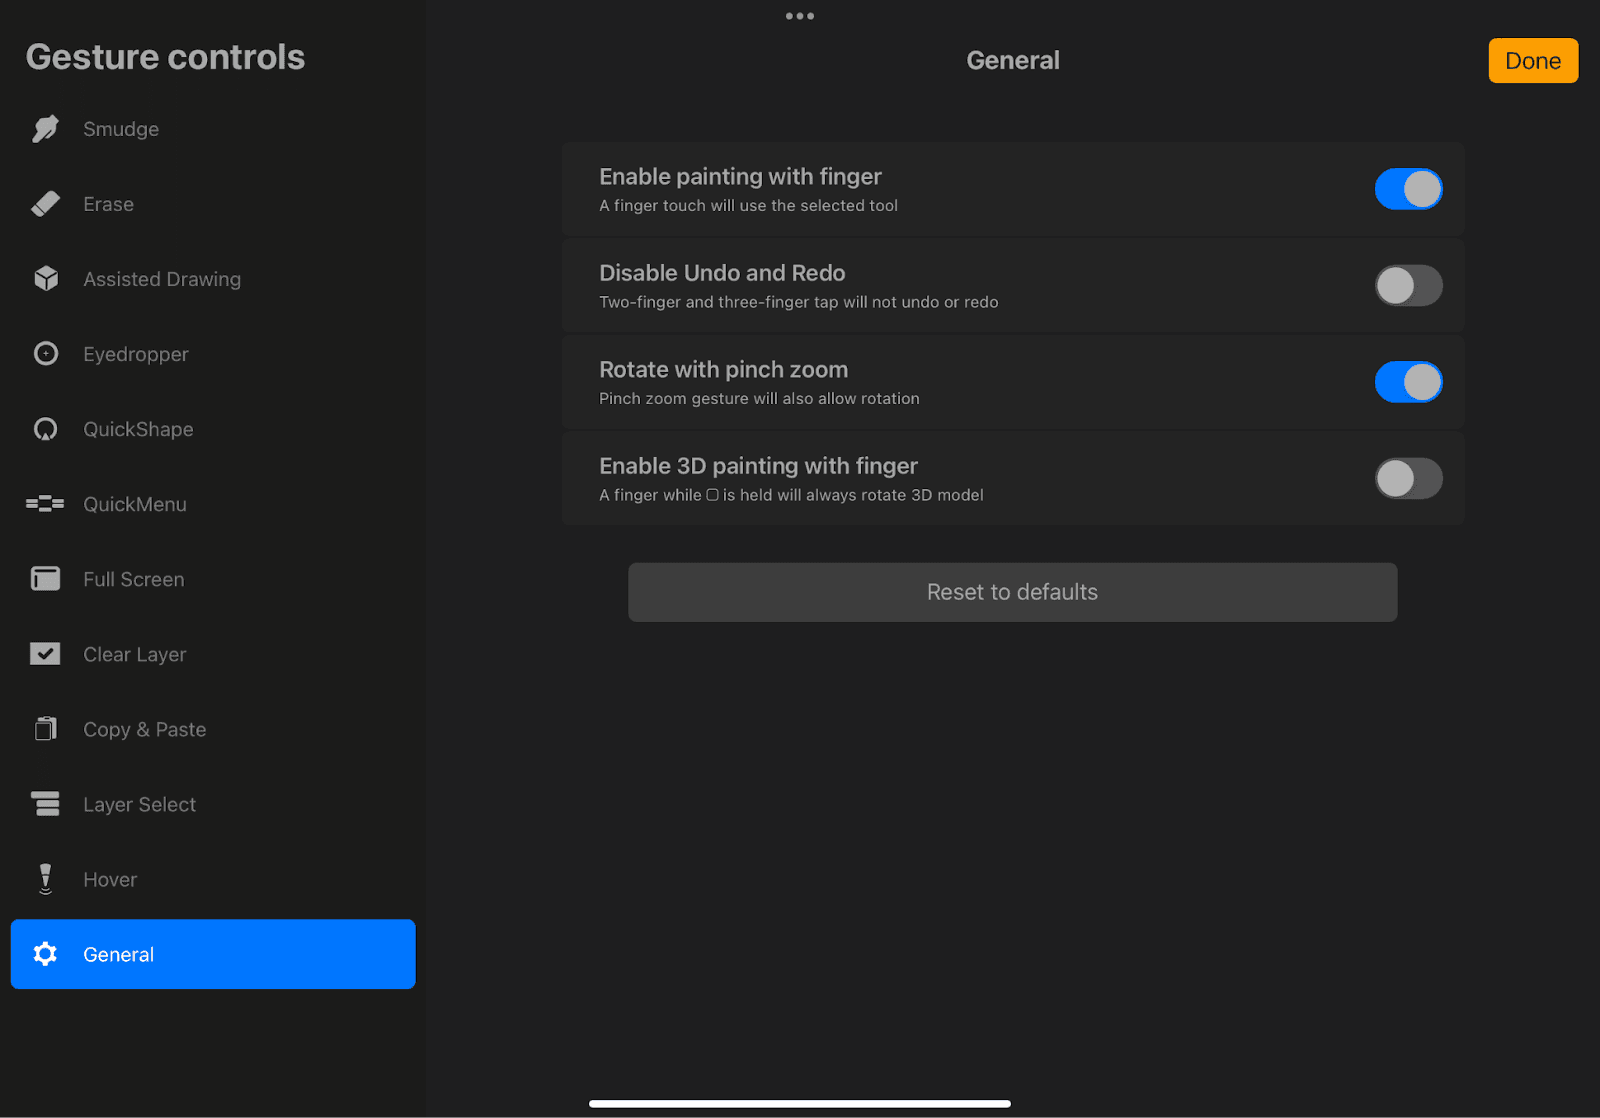
Customizing shortcuts in Procreate is a powerful way to enhance your artistic workflow. To begin, access Procreate Settings by tapping on the wrench icon in the main menu. This will take you to the "Prefs" (Preferences) section. Next, under "Prefs," you have the option to customize either "Gesture Controls" or "Shortcut Controls," depending on whether you want to modify gestures or keyboard shortcuts.
Once in the respective menu, you can assign specific actions to gestures or keyboard combinations. Simply tap on any action and choose a new shortcut or gesture from the available options.
Utilizing Procreate's Hidden Features
Procreate is a feature-rich digital art tool. While many of its functionalities are well-known, there are hidden gems that can further enhance your productivity and creativity. These include:
QuickShape: Procreate's QuickShape feature allows you to draw perfect shapes effortlessly. Draw a shape, such as a circle or a triangle, and hold your stylus or finger until Procreate automatically converts it into a precise shape. This saves time when creating geometric elements like logos or icons.
Drawing Guide: The Drawing Guide provides customizable grids, symmetry, and perspective tools. To access it, tap the wrench icon and select "Canvas" and "Drawing Guide." This feature helps maintain consistent proportions and symmetry in your artwork, making it ideal for character design and architectural illustrations.
Alpha Lock: Alpha Lock allows you to limit your painting to the existing content on a specific layer. To activate Alpha Lock for the layer, simply double-tap the layer thumbnail – a menu will appear, and you'll see the option "Alpha Lock." Tap it, and you'll notice the layer thumbnail now has a checkerboard pattern, indicating that the transparency is locked. You can now paint, erase, or apply other adjustments to this layer, but it will only affect the existing content.
Clipping Masks: Clipping Masks are used to apply the content of one layer to the shape of another layer below it. Make sure you have two layers: the base layer (e.g., a shape or an object) and the layer you want to apply as a mask (e.g., texture, shading). Ensure that the layer you want to use as a mask is above the layer you want to clip it to. To apply the Clipping Mask, double-tap the thumbnail of the layer you want to use as the mask until a menu appears. Select "Clipping Mask." Now, anything you paint or draw on the clipped layer will only appear within the boundaries of the layer below it.
The Bottom Line: Embrace Your Procreate Journey of Creativity and Self-Expression
As you have discovered in this article, Procreate is a remarkable digital art tool that offers endless possibilities for creativity and self-expression. Remember that learning and mastering Procreate is a continuous process, and your journey as a digital artist is filled with exciting growth opportunities.
Embrace every chance to explore new features, experiment with different brushes and techniques, and seek inspiration from fellow artists. The more you immerse yourself in the world of Procreate, the more your skills and creativity will flourish.
The canvas awaits your imagination and artistic touch – go forth and create wonders!